
DIY tutorial: Dolce & Gabbana jeweled headband for less than 20$
11:00 AM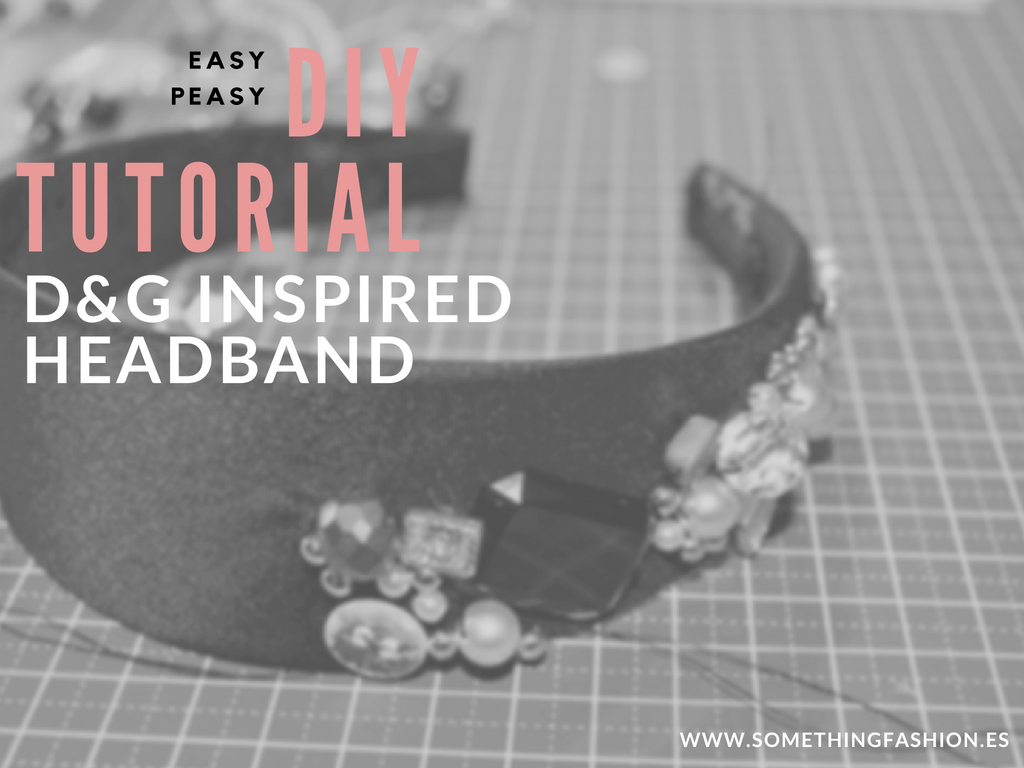
If there's something I've been obsessed for a long time now, it's been Dolce & Gabbana designs. Since I started following their fashion shows and catwalk steps about 3 or 4 years ago, I've fallen in love with too many of their items to keep the count of them. Still, my budget is limited and a regular college student can't obviously afford one of their designs.
As I've been really inspired and really in the mood these last days on crafting and creating new DIY projects, and although tutorials on how to make it like a pro can be found all over the Internet, I've decided on showing you guys how to master the Dolce & Gabbana inspired jeweled headband from their FW 2012-2013 fashion show inspired in baroque and Italian nobility.
Supplies and things you'll need:
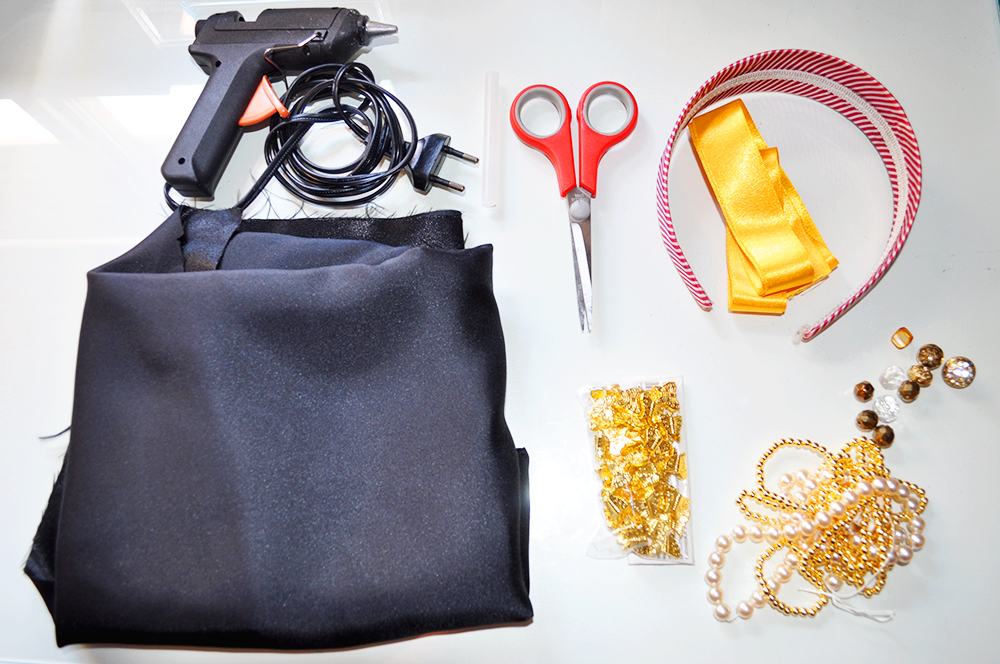
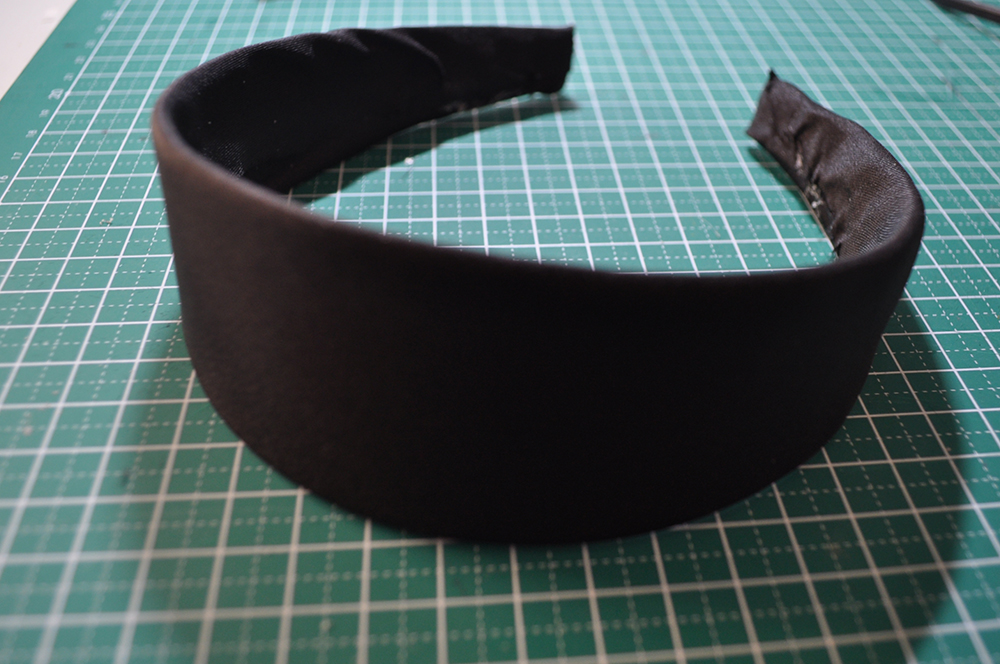
- A wide covered with fabric headband. Preferably covered with black fabric or black velvet, but you can cover it yourself if you can't find it
- Optional: A piece of black fabric to cover the headband
- Optional: Satin ribbon on the color of your choice (preferably black, golden or maroon) to tie the headband
- Optional: Needle and thread
- Scissors
- Hot glue gun and gun sticks
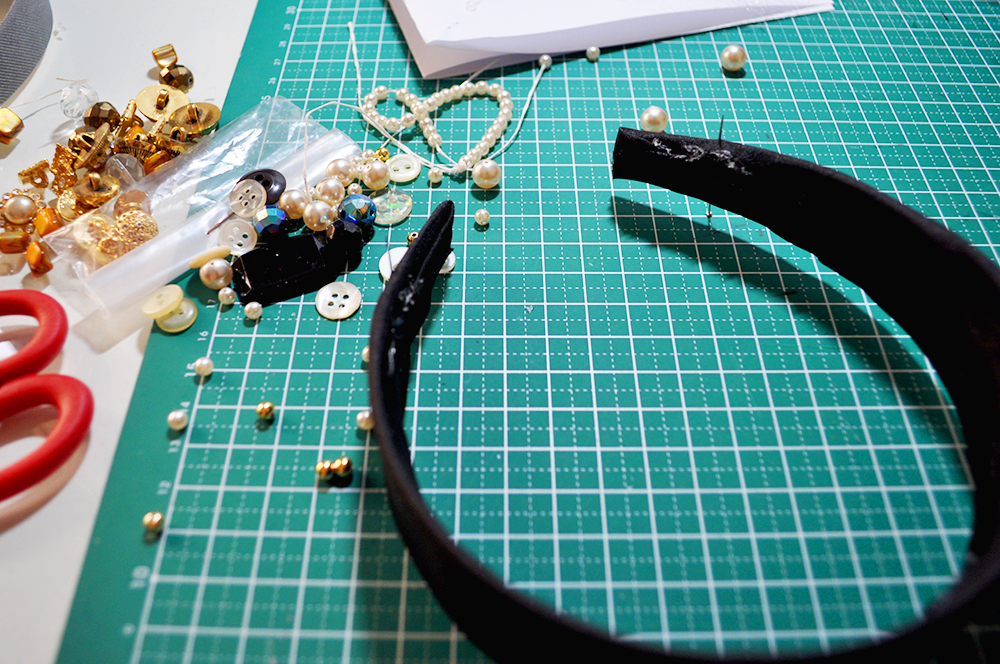
- Buttons, Swarovski, beads, faux pearls and any embellishment you like
Recommendations:
It's better if you stick to a 2 to 3 color schemes on making your headband. I chose for mine only black, golden and transparent beads and buttons. Otherwise, if you find any other bead or embellishment but not in your preferential color, buy a spray and color it!
Let's get started
Step 1 (optional):
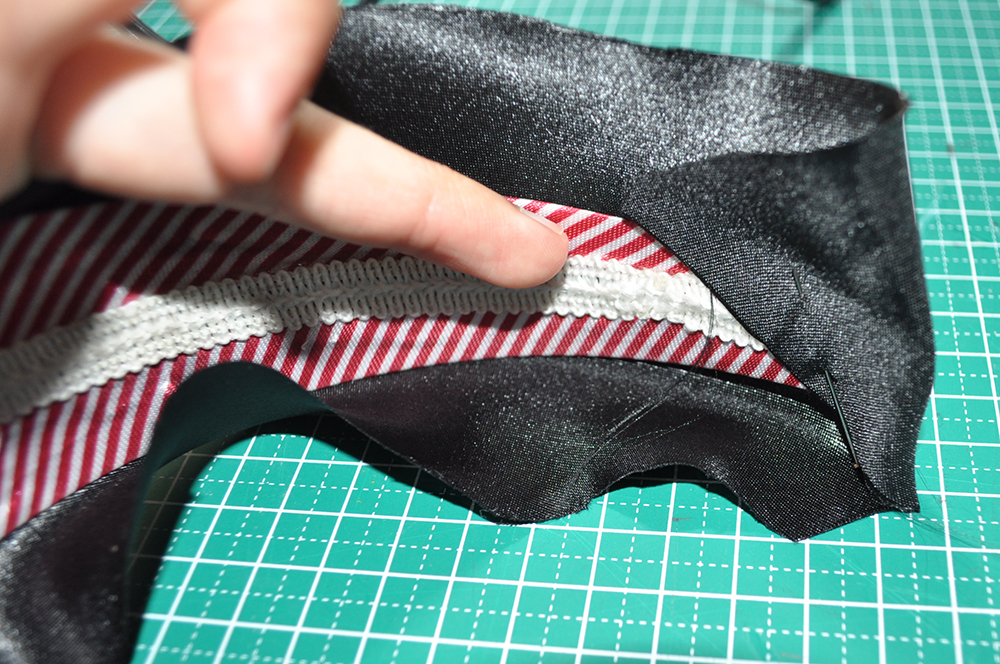 Place your wide, non-black-fabric headband on the black velvet or the black fabric and use it as a guide for bias cutting a piece of fabric. Place the headband as if you would like to roll it on the fabric, and cut along the imaginary line the headband makes, leaving 3 to 5 extra cm along the width and the length of the headband. This will help you glue the fabric to the headband!
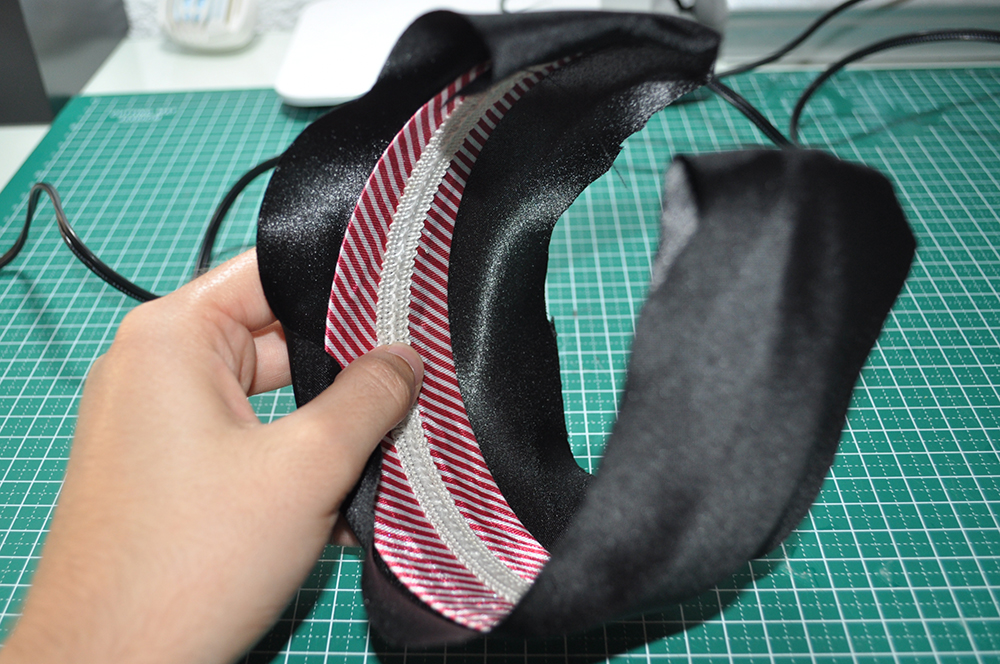
Step 2 (optional):
Put two pins on the ends of the headband, and carefully glue the black fabric to it being careful with the ends so they look neat and clean. Once you arrive at both ends, carefully leave a pin at a time, and finish covering your headband.
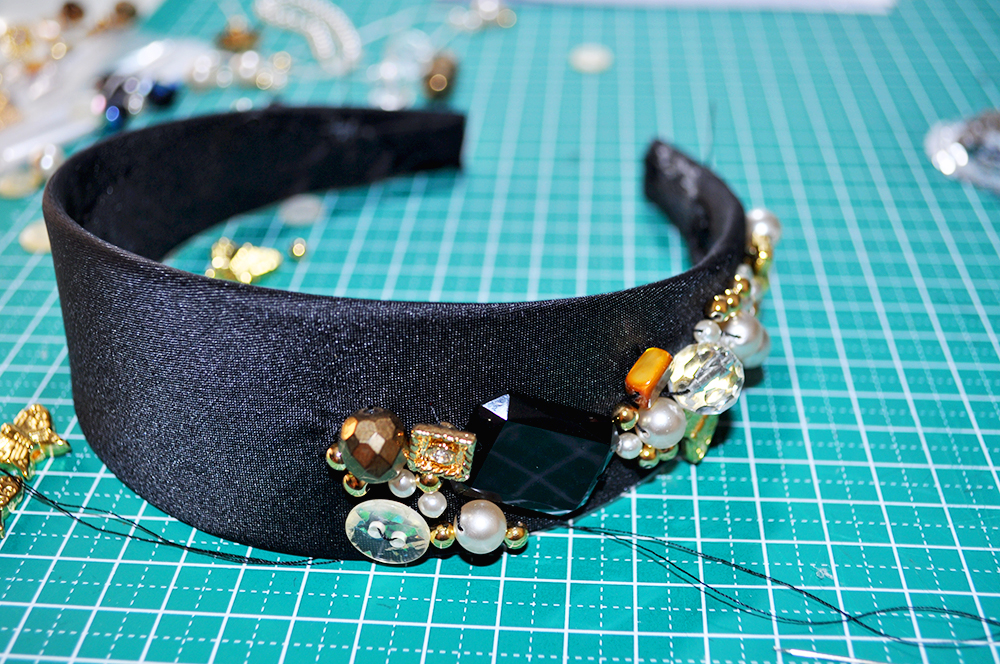
Step 3:
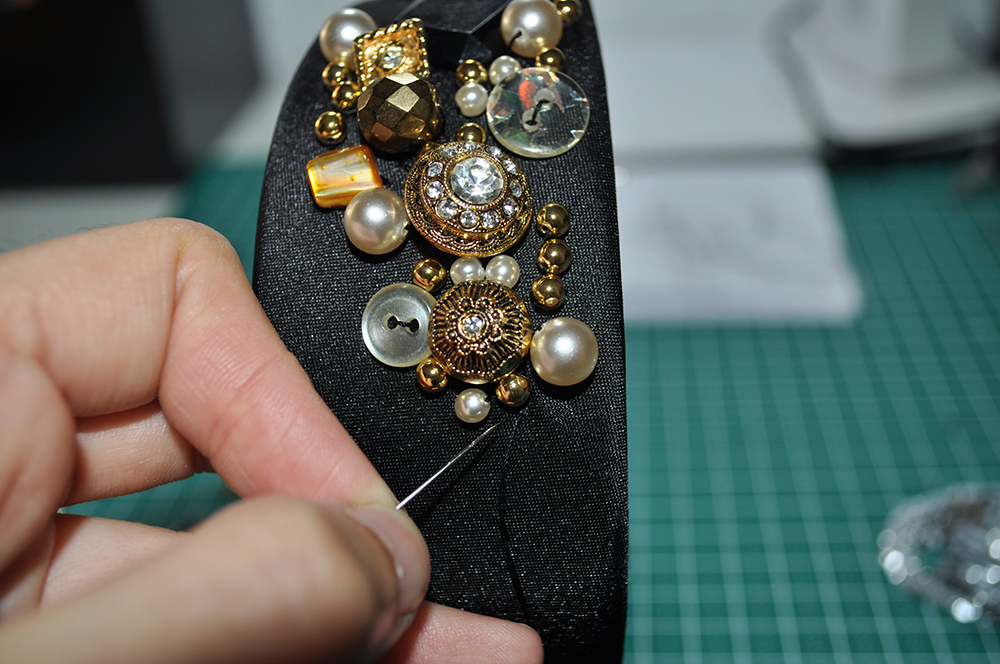
Now that your headband is covered and we have a nice and neat background to work at, let's start gluing the pearls, stones, and jewelry. First, try on your headband and carefully place two pins when your ears are. One pin each side. That will mark where you're going to start putting jewelry.
In my case, I must say I finally ended sewing them. It takes a bit more of time, but it assured me a much better result than glue (looks like my fabric repealed the glue, and all the jewelry ended falling off) and the security on the beads was indisputably better.
If your fabric covering the headband is a satin, or a slippery kind of fabric, I would go for sewing the beads. Otherwise, if your fabric is a kind of velvet or cotton fabric, then go for glue.
Step 4 (optional):
I thought a piece of ribbon on each side of the headband would look great. However, I finally didn't put it. In case you'd like to add it to the sides of your headband, so you can tie it at the back of your neck, just sew (or glue) two pieces of ribbon about 30cm each at each side of your headband.
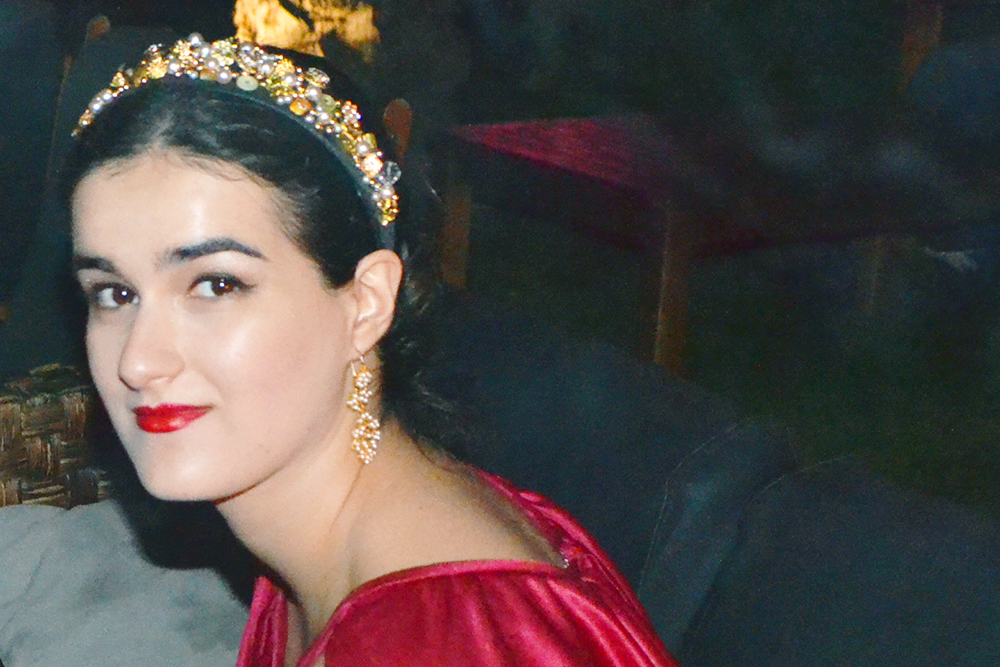
And you're done with your jeweled headband inspired on Dolce & Gabbana 2012-2013!
Did you try this DIY tutorial? Will you share your design?
![About [span]me[/span]](https://farm5.staticflickr.com/4335/35565816704_416c791419_o.jpg)


4 comentarios
Q pasada este DIY! Y q chula te ha kedado es diadema :D
ReplyDeleteBesos mi ChicAdicta!
www.piensaenchic.com
Muchas gracias!! :)
DeleteQué mañosa!! Te ha quedado genial Amanda, una diadema preciosa, original... y le va que ni pintado a ese rojo
ReplyDeleteun beso!
Ohhh! I love that headband! Keep on doing more DIYs!
ReplyDeleteTons of kisses and hope we can meet someday!
Walk a million miles
Instagram
Facebook